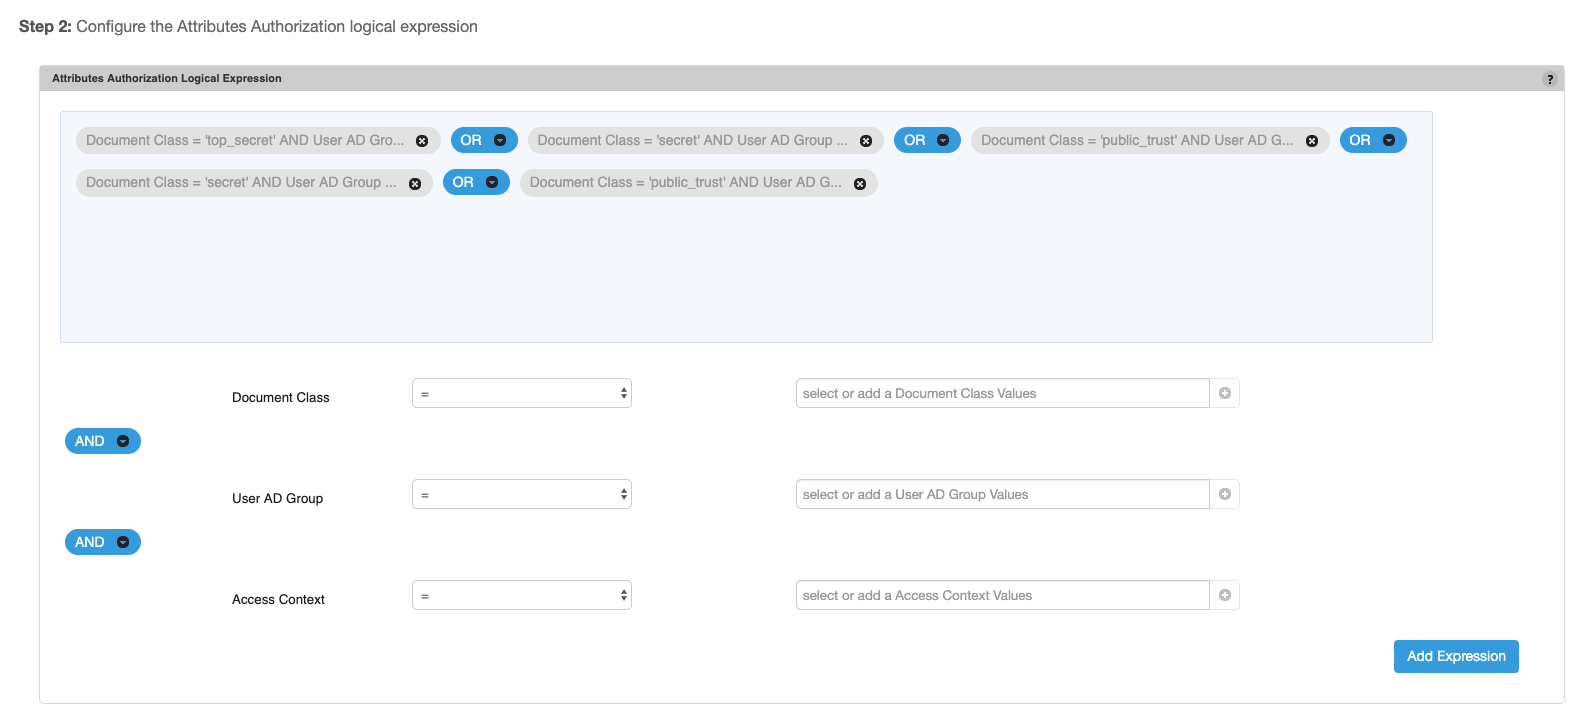
This type of authority receives a number of attributes as run-time parameters. Typically these attributes are retrieved from identity stores like LDAP/AD or Databases and the attribute authorization authority is configured as an authority in the output policy of a LDAP/AD or Database policy authority. The authority provides an intutive user interface for building a logical expression of any complexity using the run-time parameters and literals as shown in the example below.
Configuring the authority
To configure the authority, complete the following steps.
- Sign into the Administrative Console.
- Click Create New Authority.
- Ensure that Attribute Authorization is selected in the Authority Type list box.
- Type a name for the authority in the Authority Name box.
- Type a name for the authority in the Authority Display Name box.
- Type a description of the authority in the Authority Description box (optional).
- Use the Runtime Parameters area to add and configure the parameters that are used in the execution of the authority, e.g. email address or user ID. The values of these parameters will be supplied by the end user at runtime. For each runtime parameter, specify the following:
- Type the name of the parameter in the Name box. The parameter name gets paired with the value provided at runtime and sent to the custom REST authority.
- Type the label of the box displayed to the end user in the Display Name box.
- If the parameter will contain a sensitive value, such as personally identifiable information, select the Obfuscate check box. This instructs Resilient Access to substitute an opaque token for the value as it transits the network, ensuring that the value is opaque to other authorities that may be part of the policy workflow.
- If the user will provide the value in the initial request form, select the Initial Request check box. NOTE: Resilient recommends leaving the Initial Request check box blank if the value is sensitive or contains personally identifiable information.
- Select the Mask Input checkbox to mask the values with bullet characters as the user types them in. This protects against shoulder surfing.
- The logical expression is built in the Attributes Authorization Logical Expression panel by creating sub-expressions that combine the run-time parameters. The sub-expressions are then joined through the
ANDandORjoin operators. To create Attribute Authorization expression follow the steps below- For each run-time parameter specify at-least one value, multiple values can be provided by either clicking the + button next to the parameter value box or by clicking the ENTER key. Values can be removed by clicking the X for an entry in the drop-down of the parameter value. When multiple values are specified for a run-time parameter the operator should be
INorNOT IN - Specify the join operator for each run-time parameter expression. Typically the run-time parameters are joined using the same join operator.
- Click Add Expression to add the sub-expression to the overall Attribute Authorization expression
- Specify the join operator that joins the sub-expression when there are multiple sub-expressions. Typically the same join operator is used to join all the sub-expressions.
- When mouse hovers over an sub-expression the entire expression is displayed in a popup tooltip.
- For each run-time parameter specify at-least one value, multiple values can be provided by either clicking the + button next to the parameter value box or by clicking the ENTER key. Values can be removed by clicking the X for an entry in the drop-down of the parameter value. When multiple values are specified for a run-time parameter the operator should be
- Once you have finished configuring the Attribute Authorization authority, click Create or Save.
-- Download Attribute Authorization as PDF --