OpenID Connect 1.0 is a REST style authentication protocol that provides an identity layer over the OAuth 2.0 (OAuth2) protocol. OAuth2 is a ubiquitous authorization protocol that is used for various integration functions both at the API layer and the application layer.
OAuth2 and OpenID Connect 1.0 Primer
This section briefly describes the OAuth2 and OpenID Connect workflows. If you are an OAuth2 expert, you can skip to the next section.
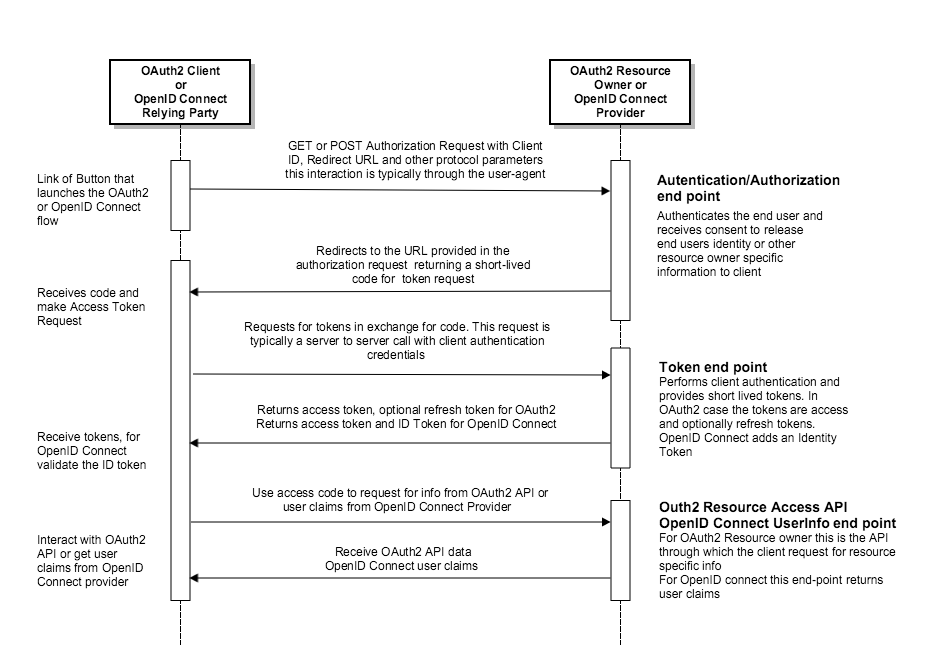
The diagram below describes a typical Oauth2 and OpenID Connect interaction:
OpenID Connect extensions
While OAuth2 is a framework for performing end-user or API authorization to gain access to a secure API provided by a Resource owner, OpenID Connect is an authentication protocol that interacts with an end-user to authenticate the user and then provide a set of user identity claims to the OpenID Connect Relying Party (RP). In addition to the access token, the OpenID Connect protocol requires the OpenID Connect Provider (OP) to return a ID token. This ID token must be a JSON Web Token (JWT) and have a specific set of user identity claims that are specified here. The Relying Party is expected to validate the ID token before it requests for user identity information.
The user info end-point of the OP should provide OpenID Connect standard user identity claims in the specified attribute names and OP specific additional claims that it wishes to provide for a valid access token.
Resilient Access OpenID Connect Provider
The Resilient Access OpenID Connect Provider is fully compliant with the OpenID Connect 1.0 and OAuth 2.0 specs. It provides an intuitive and customizable interface for building OpenID Connect Relying Party applications that can make full use of the network based access management workflow capabilities in TNaaS. It provides feature to configure the authentication user experience to match your organizations branding and themes. It also provides additional functionality beyond the OpenID Connect spec to make it easier to integrate with your Relying Party applications such as configuration options for returning application specific claims and logout functionality. The following sections provide step by step guide to build your OpenID Connect Relying Party application
Configuration
The first step is to create the Resilient Access policy that will be used for OP authentication. The policy can use all the Resilient Access capabilities for building an access management workflow. In this example we will create a two factor authentication policy that authenticates a user against an Active Directory, retrieves the phone number from the active directory and performs 2nd factor phone authentication and retrieves the user info claims through an LDAP/AD Attribute Provider authority.
Create the authorities for your authentication policy
- Create the LDAP/AD Authentication authority to authenticate users against your organization’s AD. Deploy the authority connector and make authority online.
- Create the LDAP/AD Policy Authority to retrieve the phone numbers from your organization’s AD and perform phone authentication. Deploy the authority connector and make authority online.
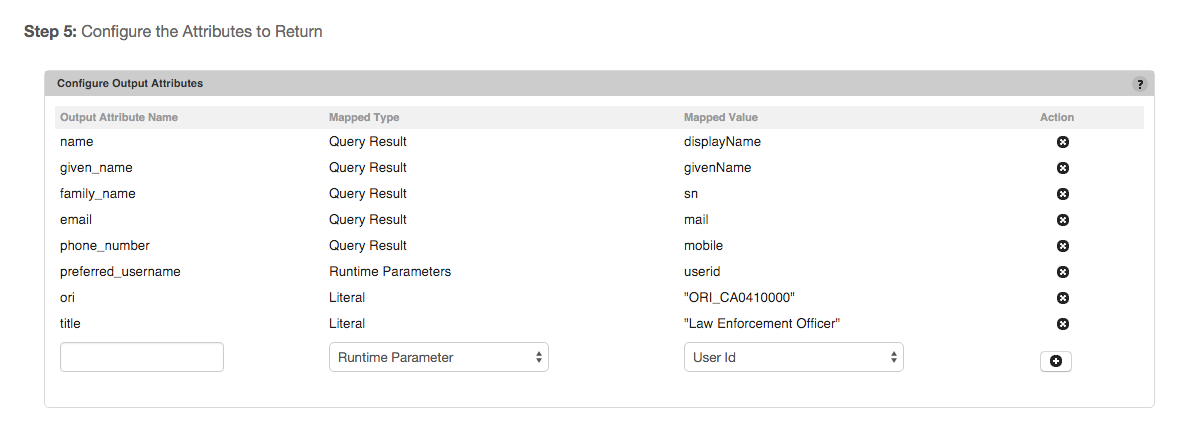
- Create the LDAP/AD Attribute Provider Authority to retrieve the user claim attributes from the AD and any other attributes that you wish to return to your RP application as additional claims. Map the AD attributes to the corresponding OpenID Connect standard claims in the Configure Output Attributes section of the LDAP/AD Attribute Provider authority. Deploy the authority connector and make authority online.
Create the authentication policy
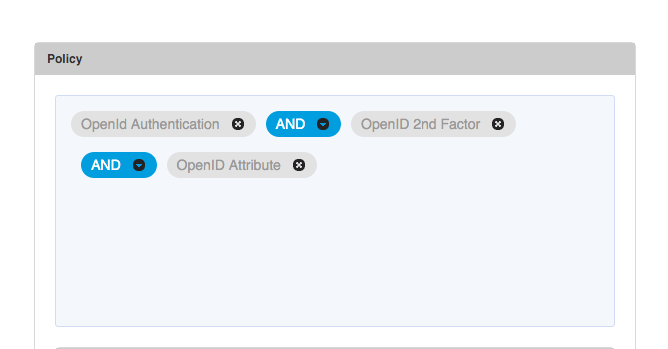
Now that the authorities required for the policy have been created and deployed on your authority connector server, we can create the authentication policy by simply dragging and dropping the authorities into the Policy panel. For our example 2 factor authentication policy the policy expression looks as follows:
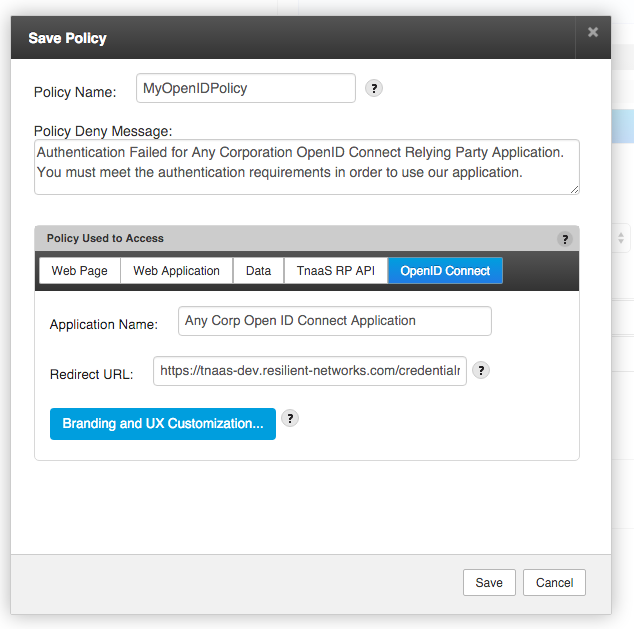
Click next to complete the creation of the Policy. Specify a name and your customized deny message and select OpenID Connect from the Policy Used to Access panel. For your OpenID Connect application specify the Application Name and Redirect URL. As per the OpenID Connect spec the Redirect URL specified in the configuration must match the redirect_uri parameter that is passed to the /openId/authenticate end-point.
Click the Branding and UX Customization… button to brand and theme the authentication UX to match your application.
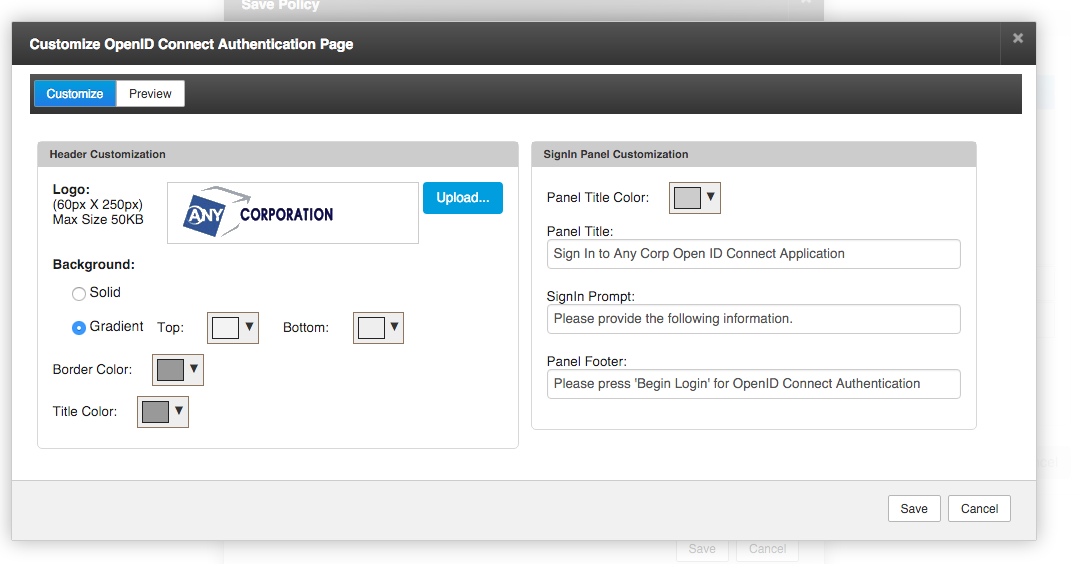 You can instantly preview how your authentication start screen will appear through the Preview tab.
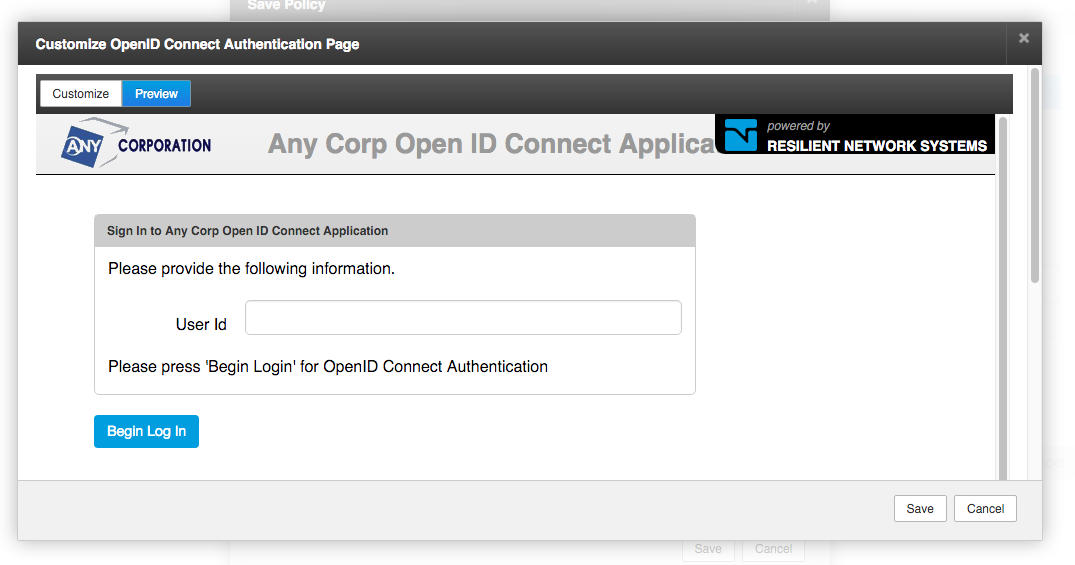 Save the Customize OpenID Connect Authentication Page and the Save Policy popups and you can now view the OP integration details by clicking the
 ![]() icon next to OpenID Connect authentication policy you just created. Resilient Access generates a Client ID and Client Secret and provides the OP end-points for your RP application.
icon next to OpenID Connect authentication policy you just created. Resilient Access generates a Client ID and Client Secret and provides the OP end-points for your RP application.
Test the OpenID Connect Integration
You can quickly test the OpenID Connect integration using our online OpenID Connect sample client at the URL:
https://oidc.resilient-networks.com/login?clientid=<YOUR_CLIENT_ID>&secret=<YOUR_CLIENT_SECRET>
Replace YOUR_CLIENT_ID and YOUR_CLIENT_SECRET with the values from your OpenID Connect Policy details popup. The exposure of the Client Secret in the RP Client app is just for demo purposes, in a real world application the client secret is never sent as a part of web browser HTTP request.
The following screenshots shows the authentication flow for our customized OpenID Connect RP application
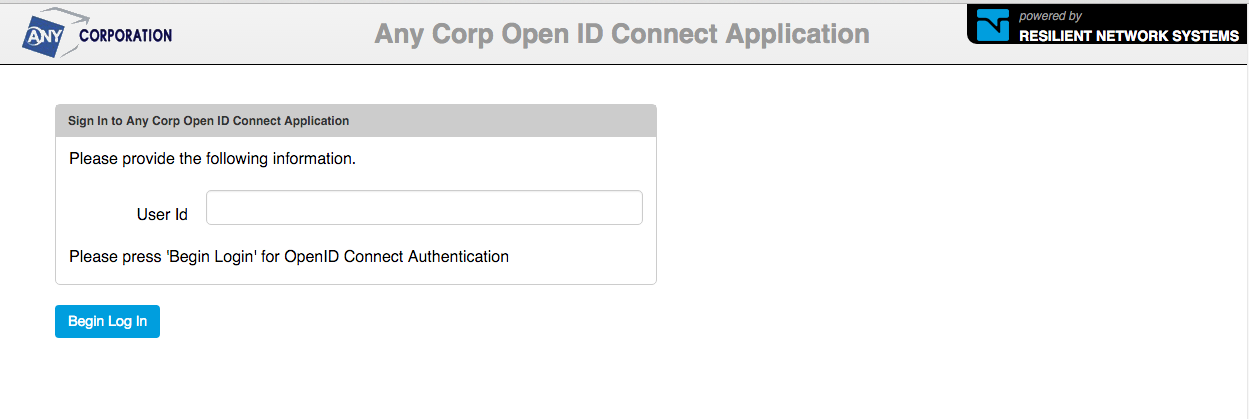
From a link or button in the OpenID Connect RP app, the /openId/authenticate end-point is called which lands the user into the customized authentication page.
Enter the userid/email and click Begin Log In to start the authentication process. Will be prompted for the password.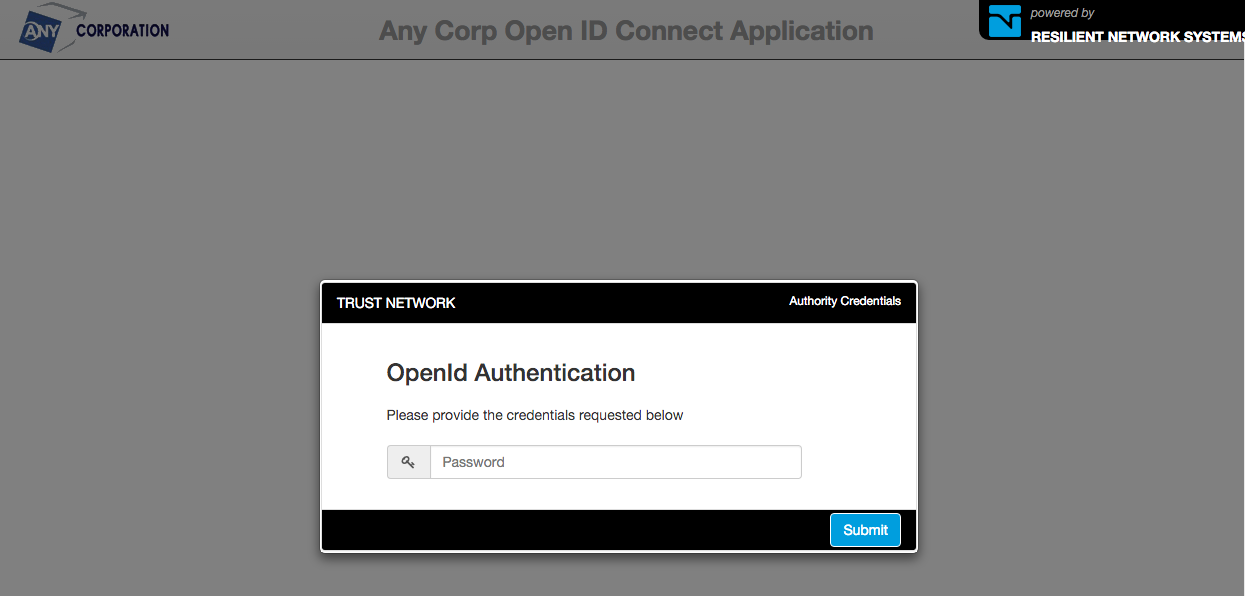
After passing through the AD Authentication, the 2nd factor phone authentication will be prompted.
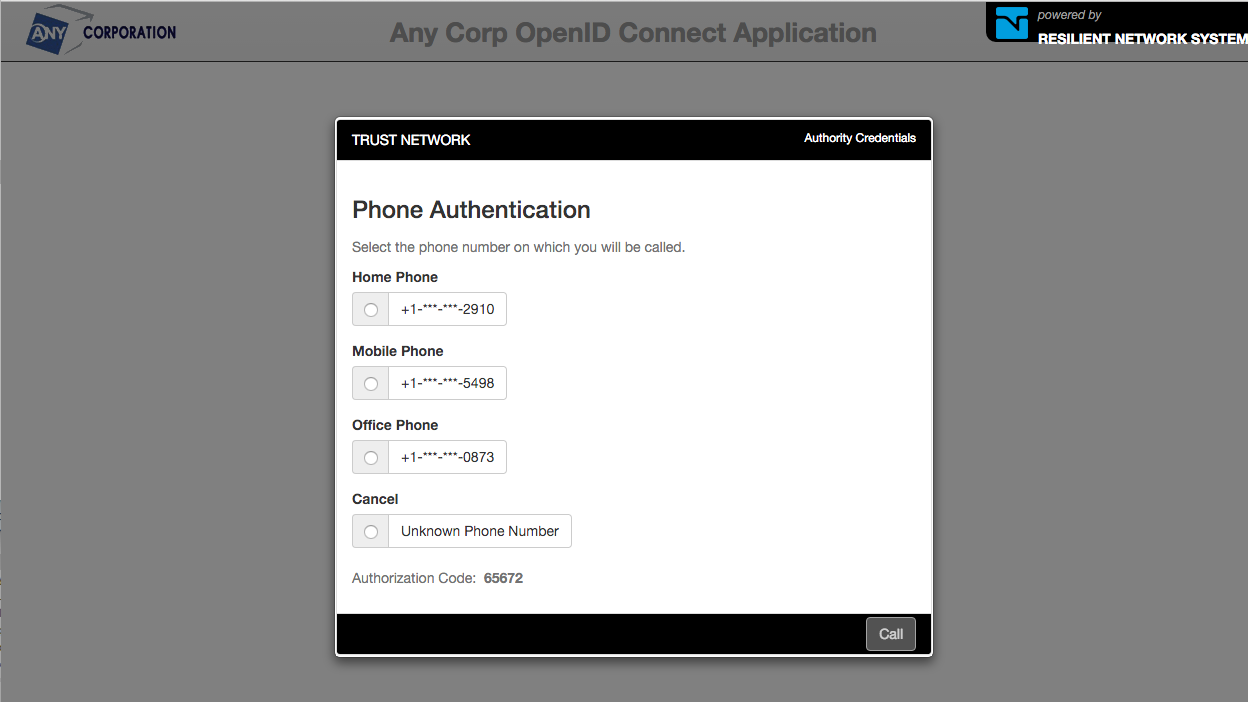
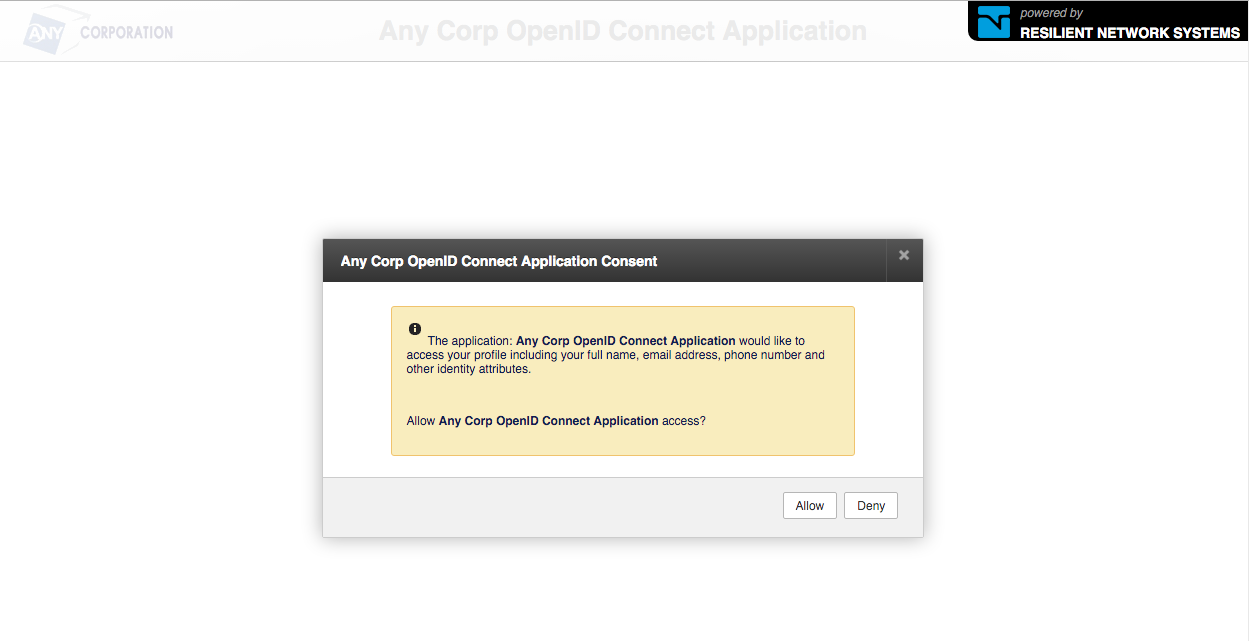
Selecting a phone number, will call the phone and the voice prompts will prompt for the authorization code. After successfully completing the second factor authentication, the OpenID Connect consent dialog will be displayed.
On clicking Allow the authentication flow will complete and control will be passed to the Redirect URL for exchanging the code for the access token and retrieving the end-user claims.
Implementing the OpenID Connect Client
Now that you have configured your OpenID Connect RP application’s authentication policy you are ready to implement the client code in your preferred development environment. Resilient Access implements the Authentication using Authorization Code Flow of the OpenID Connect spec. The sections below has the details of the OpenID Connect end-points Resilient Access provides. Resilient Access provides a minimal reference OpenID Connect client implementation in GoLang on GitHub. You can use this as the starting point for your OpenID Client implementation.
Authenticate end-point
Endpoint URL: https://tnaas.resilient-networks.com/openId/authenticate
Method: GET or POST
Parameters:
    scope: openid - REQUIRED
    response_type: code - REQUIRED
    client_id: <TNAAS Generated Client ID> - REQUIRED
    redirect_uri: <Relying Party Redirect URI after authentication> - REQUIRED
    state: <Random value from RP to prevent CSRF, XSRF> - OPTIONAL
    nonce: <Prevent replay attacks> - OPTIONAL

Example:
GET https://tnaas.resilient-networks.com/openId/authenticate?
    response_type=code
    &scope=openid%20profile%20email
    &client_id=046024858031286
    &state=af0ifjsldkj
    &redirect_uri=https%3A%2F%2Fclient.example.org%2Fcb HTTP/1.1
- The scope parameter must contain the value openid. It can contain other scopes defined in OAuth2 and OpenID Connect specs
- The response_type parameter must be code.
- The redirect_uri parameter must be exactly the same as specified in the Redirect URL field in the TNaaS policy configurations not including query and fragment portions. You may pass instance specific query parameters in the redirect URL. The redirect_uri may be URL encoded.
- If this end-point is called in a HTTP POST the parameters must be passed in application/x-www-form-urlencoded format.
Token end-point
The token end-point performs client authentication before it will process the request from the RP. TNaaS OP uses the client_secret_jwt type of OpenID Connect Client Authentication. This means the RP application must create a JSON Payload as specified below. The signature of the JWT must use HMAC SHA256 (HS256) Algorithm as per the JWT spec. The secret for the HMAC is the client secret provided when the policy is created in Resilient Access. The ID token is also a HMAC SHA256 JWT with the required fields as per the ID Token specification.
Endpoint URL: https://tnaas.resilient-networks.com/openId/token
Method: POST
Headers:
    Content-Type: application/x-www-form-urlencoded
    Accept: application/json
Post Parameters:
    grant_type=authorization_code
    code=<The code received in the redirect from /authenticate>
    redirect_uri=<The redirect URL specified in the policy config>
    client_assertion_type=urn:ietf:params:oauth:client-assertion-type:jwt-bearer
    client_assertion=<The client assertion JWT>

Client Assertions JWT Payload:
{
   "iss": <The Client ID from TNaaS>,
   "sub": <The Client ID from TNaaS>,
   "aud": "https://tnaas.resilient-networks.com/openId/token",
   "jti": <The unique identifier from RP, e.g. a UUID>,
   "exp": <The time in milliseconds when the client assertion will expire>,
}

Response:
   Content-Type: application/json
   Response Body:
   {
       "access_token": "<The access token for getting user info>",
       "token_type": "Bearer",
       "expires_in": "<The time in seconds when the authenticated credentials will expire>",
       "id_token": "<Authentication JWT>"
    }

Example:
POST /token HTTP/1.1
  Host: tnaas.resilient-networks.com
  Content-Type: application/x-www-form-urlencoded
  Body:
    grant_type=authorization_code&code=SplxlOBeZQQYbYS6WxSbIA
    &redirect_uri=https%3A%2F%2Fclient.example.org%2Fcb
    &client_assertion_type=urn:ietf:params:oauth:client-assertion-type:jwt-bearer
    &client_assertion=eyJhbGciOiJSUzI1N....

Response:
{
    "access_token":"P1tWrH8whlm1Gh7”,
    "token_type":"Bearer”,
    "id_token":"eyJhbGciOiJIUzI1NiIsInR5cCI6IkpXVCJ9.eyJpc3MiOiJodHRwczpcL1wvdG5hYXMtZGV2LnJlc2lsaWVudC1uZXR3b3Jrcy5jb21cL29wZW5JZCIsInN1YiI6ImQ2MjAyY2MyLTdhYmEtNGQ2OC04ZmNiLTExMzZkMmMyZTc0ZSIsImF1ZCI6IjgxMDU1NjcwNzgwNTA0NCIsImV4cCI6MTQ1NTA1NzE4NDgzOSwiaWF0IjoxNDU1MDU2ODg0ODM5LCJhdXRoX3RpbWUiOjE0NTUwNTY4ODIwMjQsIm5vbmNlIjoiNjA0ZjFhMjMtOTY3ZC00ZTcxLWIwMTYtY2Y5ODRiMmYwODY0In0.nqezBftUtnCtjConcLKn_4_QYwo2xB3_YyHV8Y522s0”,
    "expires_in":1201,
    "state":"7150dab6-1267-4413-8244-28c99c400d66”
}

The JSON Payload of the ID Token:
{
    "iss":"https:\/\/tnaas-dev.resilient-networks.com\/openId”,
    "sub":"d6202cc2-7aba-4d68-8fcb-1136d2c2e74e”,
    "aud":"810556707805044”,
    "exp":1455057184839,
    "iat":1455056884839,
    "auth_time":1455056882024,
    "nonce":"604f1a23-967d-4e71-b016-cf984b2f0864”
}
- The grant_type parameter should be authorization_code
- The code parameter should be the code received in the redirect from the /authenticate end-point
- The redirect_uri parameter should be exactly the same as the Redirect URL field configured in the policy in Resilient Access
- The client_assertion_type parameter should be urn:ietf:params:oauth:client-assertion-type:jwt-bearer
- The client_assertion JWT should use the HMAC SHA256 algorithm and payload should have the attributes shown above.
- The RP Client should successfully decode and validate the ID Token JWT before proceeding to the next step
User Info end-point
The last step of the OpenID Connect protocol is for the RP application to call the /token end-point to get the identity claims for the authenticated user.
Endpoint URL: https://tnaas.resilient-networks.com/openId/userinfo
Method: GET
Header:
    Authorization: Bearer <Access Token>

Response:
Header:
    Content-Type: application/json
Body:
{
    "sub":"<The user id in ID provider>",
    <user info attributes specified in config>
}

Example:
GET /userinfo HTTP/1.1
  Host: tnaas.resilient-networks.com
  Authorization: Bearer SlAV32hkKG

HTTP/1.1 200 OK
  Content-Type: application/json
  {
   "sub": "248289761001",
   "name": "Jane Doe",
   "given_name": "Jane",
   "family_name": "Doe",
   "preferred_username": "j.doe",
   "email": "janedoe@example.com",
   "picture": "http://example.com/janedoe/me.jpg"
  }
- The Authorization header must be provided with value of Bearer <Access Token>
logout end-point
The Resilient Access OP provides an extension to the OpenID Connect spec that implements application logout functionality that can be useful for RP applications.
Endpoint URL: https://tnaas.resilient-networks.com/openId/logout
Method: GET
Parameters:
    client_id: <TNAAS Generated Client ID> - REQUIRED
    redirect_uri: <Relying Party Redirect URI after logout> - REQUIRED
    sub: <The sub attribute in the ID Token and /userinfo response> - REQUIRED
- The sub parameter should be set to value returned in the sub attribute of the ID Token and /userinfo responses
-- Download OpenID Connect as PDF --

