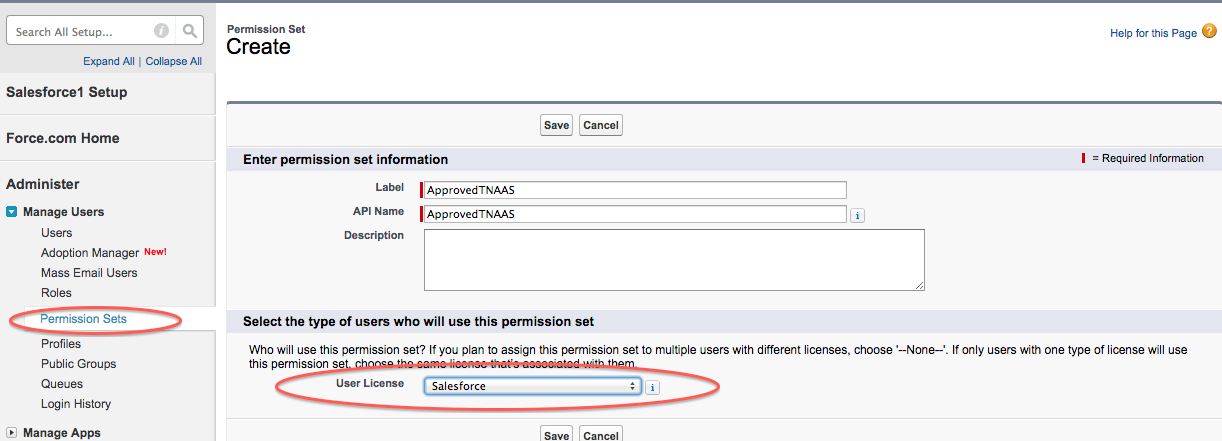
1. Create a permission set “Approved Resilient Access”
2. Click on Manage Assignments and add the Salesforce Admin users who will have access to the Resilient Access Admin Console application
3. add “Tnaas” to Assigned Connected Apps 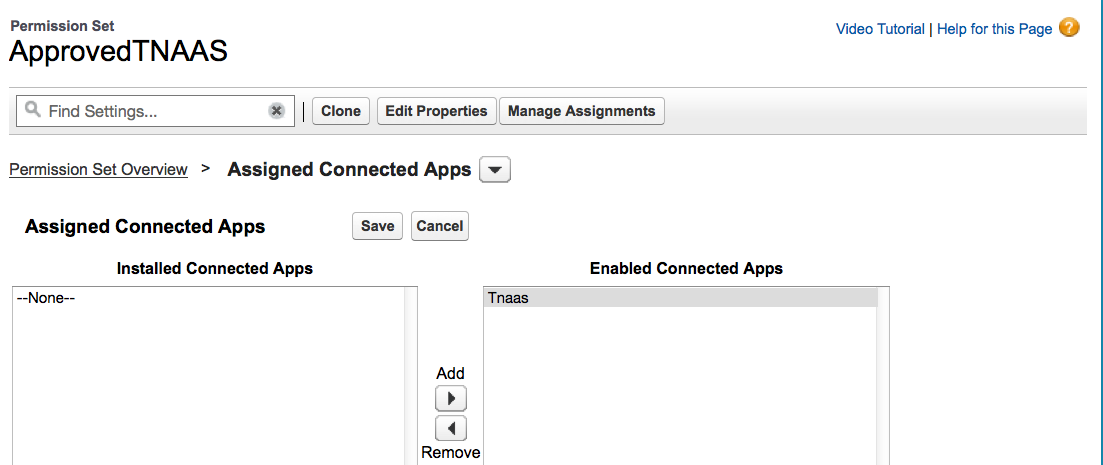
4. In “Approved Resilient Access” permission set, enable the system permissions of View Encrypted Data. From the ApprovedResilient Access permission set page from the System section, click on System Permissions. In the System Permissions page, click the Edit button to go into edit mode and check the View Encrypted Data system property.

5. Setup the users who have access to the Resilient Access application as follows:
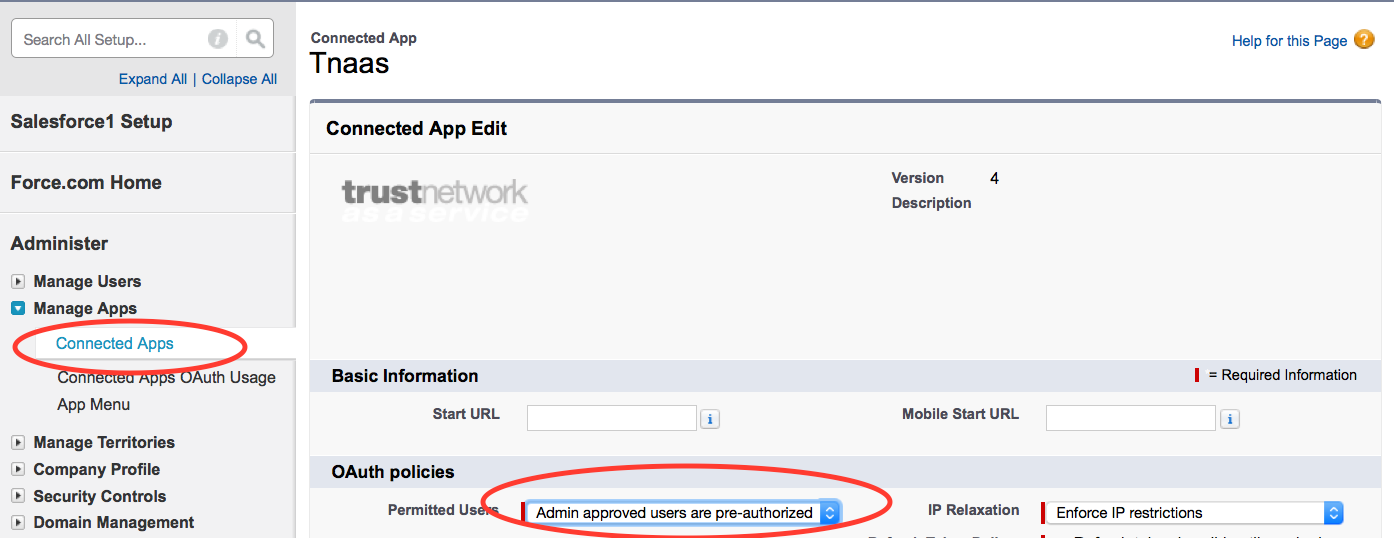
a. From Manage Apps select Connected Apps
b. Click Edit for the Resilient Access app and from the OAuth policies section select “Admin approved users are pre-authorized” for Permitted Users
c. Save the Resilient Access connected app properties.
6. Add “Trust-Network” tab to the Salesforce tabs, by clicking the + button in the Salesforce menu and then Customize My Tabs and then adding Trust_Network to the Selected Tabs

7. Post install process will create a scheduled apex job which runs every 8 hours to clean up stale Resilient Access session objects.

-- Download Resilient Access force.com package post installation as PDF --